Configure FlowForge in Docker to secure all traffic
Use Let's Encrypt and Acme Companion to quickly set up FlowForge to encrypt all traffic
Following on from our previous article in which we covered how to run FlowForge in Docker on Google’s Cloud Platform, today we are going to look at how to secure HTTP traffic to your FlowForge server.
# Introduction
When we wrote the first part of this series FlowForge didn't have an easy path to secure HTTP traffic. Happily, two versions of FlowForge later and at least partially inspired by these blogs, we have added the configuration you need in Docker to use HTTPS with minimal work.
That addition makes our job of explaining this setup a lot easier, credit to our developers for seeing the value of having an easy implementation of HTTPS in FlowForge as part of our 1.0 build.
To achieve secure HTTPS traffic we are employing a great service called Let's Encrypt. In their own words, "Let’s Encrypt is a free, automated, and open certificate authority (CA), run for the public’s benefit". In practice Let's Encrypt will allow us to easily secure HTTPS traffic.
We are also utilising a Docker image called acme-companion which makes the configuration of Let's Encrypt a breeze. To quote the project's own Github page "acme-companion is a lightweight companion container for nginx-proxy. It handles the automated creation, renewal and use of SSL certificates for proxied Docker containers through the ACME protocol". It's a great project and credit to the team over there for making it a lot easier to secure the internet.
Now we've covered our goals and the tools we are going to use let's configure our existing GCP VM to secure all web traffic.
# Prerequisites
As mentioned above, you will need to be running FlowForge version 1.0 or higher to follow this guide. If you are using an older version you can upgrade now using the instructions here.
# Update Docker Compose
The first step is to edit our Docker compose file. We're using Nano again to edit files so we will run this command:
sudo nano /opt/flowforge/docker-compose-1.1.1/docker-compose.yml
In the docker-compose.yml file, un-comment the following lines:
- "./certs:/etc/nginx/certs"- "443:443" acme:
image: nginxproxy/acme-companion
volumes:
- "/var/run/docker.sock:/var/run/docker.sock:ro"
- "./acme:/etc/acme.sh"
volumes_from:
- nginx:rw
environment:
- "DEFAULT_EMAIL=mail@example.com"
depends_on:
- "nginx"We should also redirect all traffic to use HTTPS, to do that un-comment the following in the nginx service section:
Environment:
      - "HTTPS_METHOD=redirect"
We now need to add the configuration for LetsEncrypt, edit the following lines to include a valid email address and the correct domain for where you are hosting your FlowForge server:
- "DEFAULT_EMAIL=mail@example.com"- "LETSENCRYPT_HOST=mqtt.example.com"- "LETSENCRYPT_HOST=forge.example.com"Save and exit from that file, in Nano you can do that by pressing ‘control x’ then ‘y’ then the Return key.
# Update flowforge.yml
Next, we need to edit the public_url for the MQTT broker:
sudo nano /opt/flowforge/docker-compose-1.1.1/docker-compose.yml
Then replace ws:// with wss://
public_url: wss://mqtt.flowforge-demo.comSave and exit from that file, in Nano you can do that by pressing ‘control x’ then ‘y’ then the Return key.
# Restart your Docker containers
OK, we should be ready to restart the Docker containers, run the command:
sudo docker compose -p flowforge up -d
If you reload your FlowForge root directory in a web browser you should now see that your traffic is encrypted using LetsEncypt.
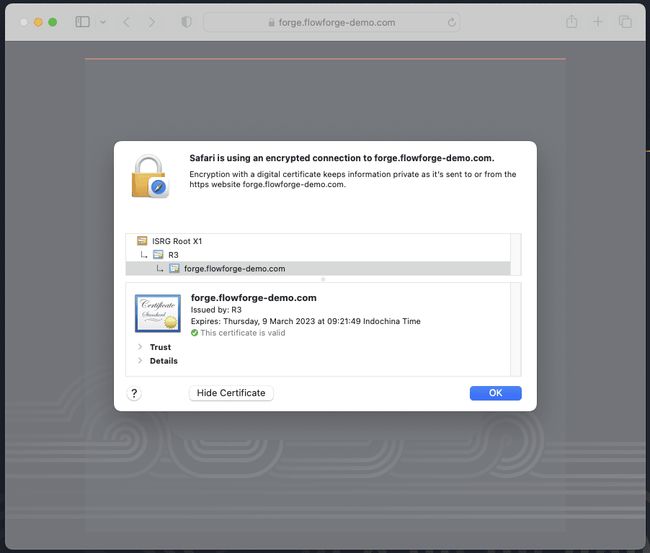
Nice! That’s it, you can now access your FlowForge installation securely.
In the next and final part of this series of articles, we are going to look at how we can actually use FlowForge including how to build flows and deploy and update them on Devices linked to a project.
Written By:
Published on:
Recommended Articles:
- Using Node-RED to Visualize Industrial Production Data via Modbus
- Community News May 2023
- Chat GPT in Node-RED Function Nodes
- Running the FlowForge Device Agent as a service on a Raspberry Pi
- Node-RED Tips - Subflows, Link Nodes, and the Range Node