- handbook
- Company
- Company
- Operations
- Product
- Development & Design Practices
- Design
- Development
- contributing
- Front End
- How We Work
- Markdown How-To
- packaging
- release
- Releases
- security
- staging
- Using Git
- Website A/B Testing
- Internal Operations
- Legal
- People Ops
- Sales & Marketing
- Marketing
- blog
- Boiler Plate Descriptions
- Content Channels
- Content Types
- HubSpot
- Marketing
- Video
- Webinars
- website
- sales
# A/B Testing
A/B Testing is a very useful exercise by which we can distribution variants of a piece of content and assess the success, defined by an arbitrary metric, for those variants.
# Defining a Test
# What are your variants?
-
Control: You must always define a
control(A). This is generally whatever the state of the content/UI looks like now. -
Test: You must then define at least one variant (B) of the content/UI.
# What does success look like?
You must have a trackable metric that the variants can compete over. Example success metrics could be:
- Clicks of a certain button, e.g. a primary or secondary CTA
- $pageview events of a certain URL
- Number of Instances spun up on FlowForge
# How we run A/B Tests
We run our A/B Testing via PostHog Experiments. These are easily configured and setup in PostHog, and require that you answer the above questions in Defining a Test
# Types of PostHog Experiments
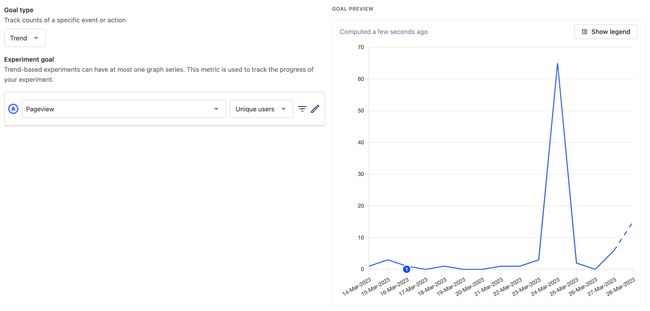
# Trend
If you are purely interested in the raw number of a particular event taking place, then you'll want a Trend Experiment, e.g:

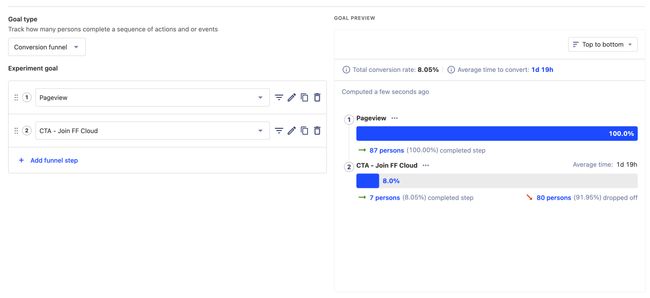
# Funnel
If you are wanting to measure an improvement in conversion, then a Funnel Experiment is the way to go. For example, if we want to increase the number of visitors clicking our primary CTA, then we could do a Trend graph, but that may also just show improvements as a result of raw web traffic improving. Making it a "Funnel" Experiment, ensures we have a clean analysis of the conversion to CTA for a visitor.

# A/B Testing on our Website
To conduct a new Experiment:
- Create an Experiment in PostHog
- Define the criteria for which users you'd like involved, and the split across the variants

- Make note of the relevant Feature Flag created, and variants (e.g.
control,testA,testB) - Wherever you want to implement the variants, includes the following (equivalanet) code:
{% edge "liquid" %}
    <h1 class="text-gray-50 max-w-lg m-auto">
    {% abtesting "<feature-flag>", "control" %}
    DevOps for Node-RED
    {% endabtesting \%}
    {% abtesting "<feature-flag>", "test" %}
    Run Node-RED in Production
    {% endabtesting %}
    </h1>
{% endedge %}
As a quick explanation of what's happening here:
edge: This tells Eleventy that we want to render this code server-side as a Netlify Edge Functionabtesting: This is an Eleventy Shortcode that will automaticlaly check PostHog feature flags & experiments<feature-flag>: The Feature Flag defined for the experiment in PostHog.